
How to print T-shirts:
Step 1: Preparing Your Artwork
Step 2: Coating Your Screen
Step 3: Exposure Unit Your Screen
Step 4: Washing Out Your Screen
Step 5: Printing Your Design
Step 6:clean-up/reclaiming screens
Step 1: Preparing Your Artwork
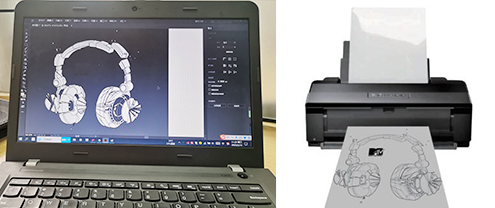
Prepare your art work in Adobe Photoshop, Adobe Illustrator or any other similar graphics program. If using Photoshop, make sure the image size is at least 300 dpi and is the actual size you want printed.
If the design consists of multiple colors, separate each color on to its own layer. Don’t use gradients!
Now that your art work is ready to print, print it onto a transparency.
If you’re printing multiple colors, each color needs to be on its own transparency paper. Try to make sure the black ink on the transparency is fairly thick or you might come across some problems. Also, only print black ink on transparencies. Even if you’re trying to print a red heart on a t-shirt, you print the image of the heart in black on the transparency.
Step 2: Coating Your Screen
Before coating your shiny new screen, it is recommended that you clean your screen with degreaser. While this is not completely necessary, it will help allow the emulsion to bond tighter with the mesh on your screen and will result in a crisper print. Also, make sure you coat your screen and let it dry in a dark room. A little light is fine, but too much exposure to UV light during this step can ruin everything, and maybe even make you cry.
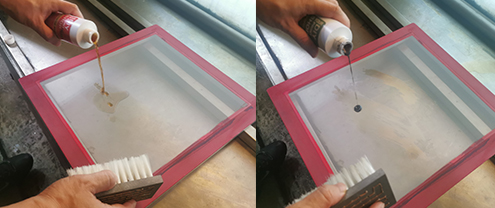
Universal Mesh Prep It is a liquid to degrease and improve the wetting characteristics of the mesh. Moreover, it can clean the dust and grease on the surface of the mesh very well.
Autoprep Gel is a surface roughness pre-treatment for the mesh prior to stencil application. more smoothly. Use a soft brush to ensure that the mesh is not damaged during the cleaning process. then, After brushing, rinse with water will be ok .
After drying the screens, it is time for coating with photo emulsion. Take the screens with all materials into a dark room without Daylight, As the emulsion cannot be in direct contact with daylight.
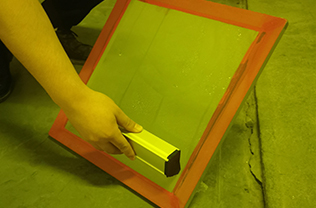
You can also apply dark colors at night.Pour the photo emulsion evenly into the scoop coater. Before you start it, I want to make a quick note about emulsion. The emulsion we use is presensitized, which means they are already mixed into it. We don’t have to do anything. We popped the lid and we can use it straight out of the container. The shop you work at may use some kind of emulsion that requires you to add the photosensitizer to it and mix it in. Just check with the superior or check with the factory or supplier for instructions on howto mix up your emulsion for your use. Anyway, the first thing you’re always going to open it up and stir and stir.

Then start your coating work. Grab your screen and place it on your holder. flat side out. The screen have two sides. This is the print side and inside the frame is the squeegee side. You can also referee to this as the outside of the screen. and this is the inside of the screen.
When you coat, you always coat the outside of the screen first, then you flip it and you coat the inside, and also when you’re handing the screen, don’t let the grubby, dirty fingers touch the mesh, even on the mesh emulsion here. and you’re gonna have problems when you’re trying to burn exposed screens. keep the dirt out ff the mesh.
Step 3: Exposure Unit Your Screen
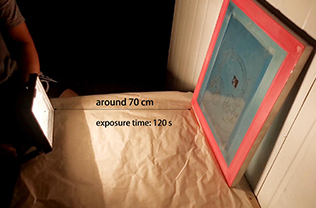
Take the transparency you created in Step 1 and tape it upside down on the print side of the dry,coated screen with scotch tape. If there is text in your design, you should make sure that it is flipped over to where you can’t read it. This may sound weird at first,but it will all make sense to you once you complete the proce.ss
For exposure, the lighting unit is simply positioned and switched on about 70-80 cm above the screen frame.
It takes about two minutes to expose our popular one-component photo emulsion.
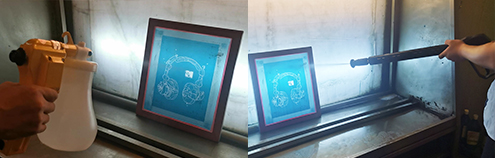
Step 4: Washing Out Your Screen
By this point, if everything was done correctly, you should see your design starting to lightly appear through the emulsion.
1, If you can see the image, you are ready to wash it out. Grab a hose and spray the print side of the screen until the image is
2, completely washed out.Of course, a simple cleaning water gun device can also be used. Convenient and fast. A good way to
3, test if your screen was washed out thoroughly is to hold it up to the sun light.
4, If your screen was washed out correctly, you should only be able to clearly see the light shining through where the design is.
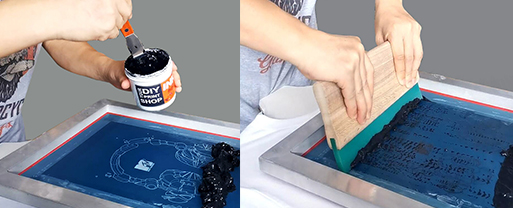
Step 5: Printing Your Design
You made it! Everything looks great and you’re ready to print your design. Grab the material you want to print on and lay it on a flat surface. Take your screen and lay the flat side (print side) down on top of the material. Make sure it is straight and centered for obvious reasons. Rest your squeegee on the far edge of your screen, and pour a bead of ink directly in front of the squeegee blade.
Pull the ink across the design holding the squeegee at approximately a 45 degree angle. Now, carefully lift up the screen, and admire your pretty design.
Step 6: Clean-up/reclaiming Screens
clean-up and reclaiming screens
— So that’s it, you are now officially a screen printing master. Well maybe not quite yet, but at least you know all of the basics. Remember, don’t get frustrated if you mess something up, just keep trying and you’ll be printing.
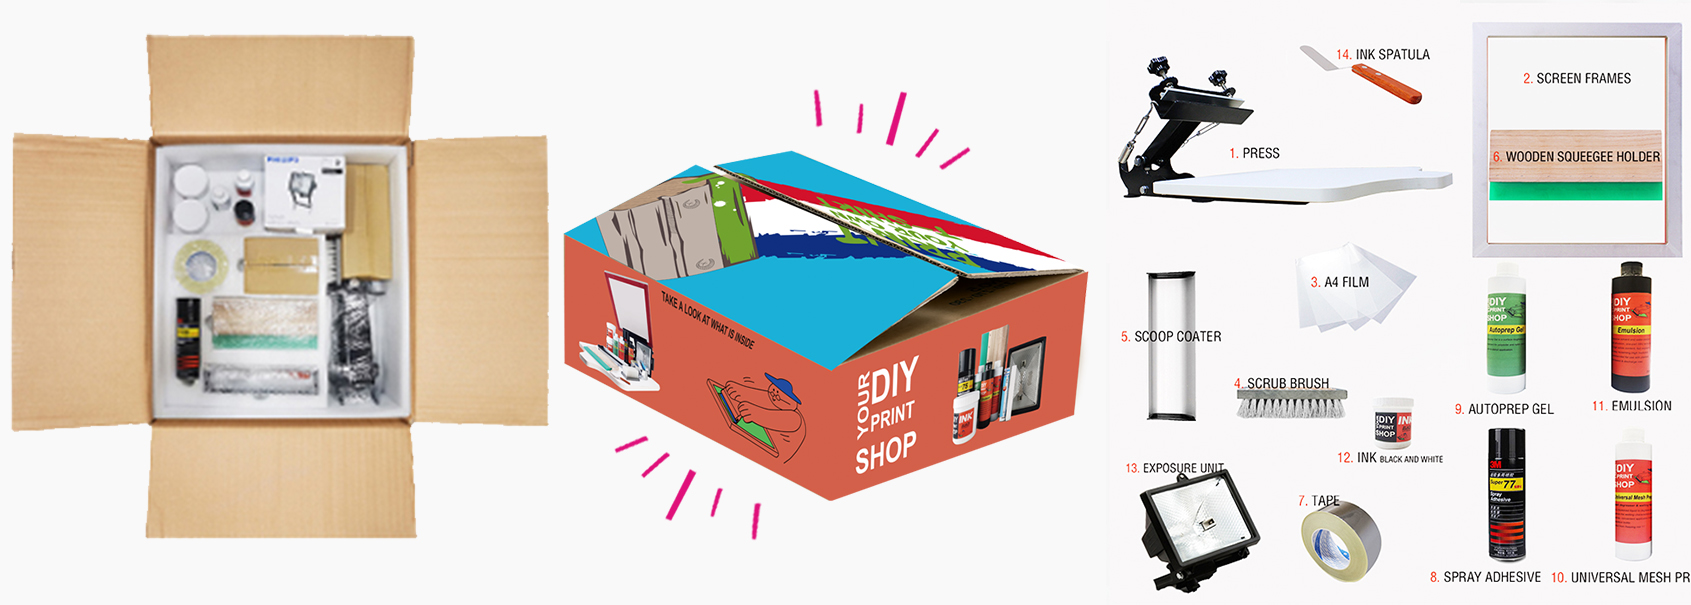
Diy Screen Printing Kit :
Post time: Feb-16-2022